Install Kali Linux as a Portable Live USB for Pen-Testing
- SWAPNESH CHOGLE
- May 10, 2021
- 3 min read

Updated: Aug 24, 2021
Kali Linux is the go-to Linux distribution for penetration testing and ethical hacking. Still, it's not recommended for day-to-day use, such as responding to emails, playing games, or checking Facebook. That's why it's better to run your Kali Linux system from a bootable USB drive.
Step 1: Download the Right Kali Linux Version
While there are many different types of Kali Linux images, the one we want for a portable live version is the "Live" download.
Visit kali.org/downloads and download the appropriate Live image.

Step 2: Install a USB Formatting Tool
On Windows, Etcher is a good tool.
Once downloaded, install it like any other app.

Step 3: Flash the Kali Live Image to the Flash Drive
Open Etcher, then click on "Select Image." You may see options for "Flash from file" and "Flash from URL" instead; choose "Flash from file".

Navigate to the Kali image you downloaded in Step 1, and select it. Then, you need to click on "Select Target" to choose your USB flash drive. Double- and triple-check that you're selecting the right drive by looking at the drive name and space available.
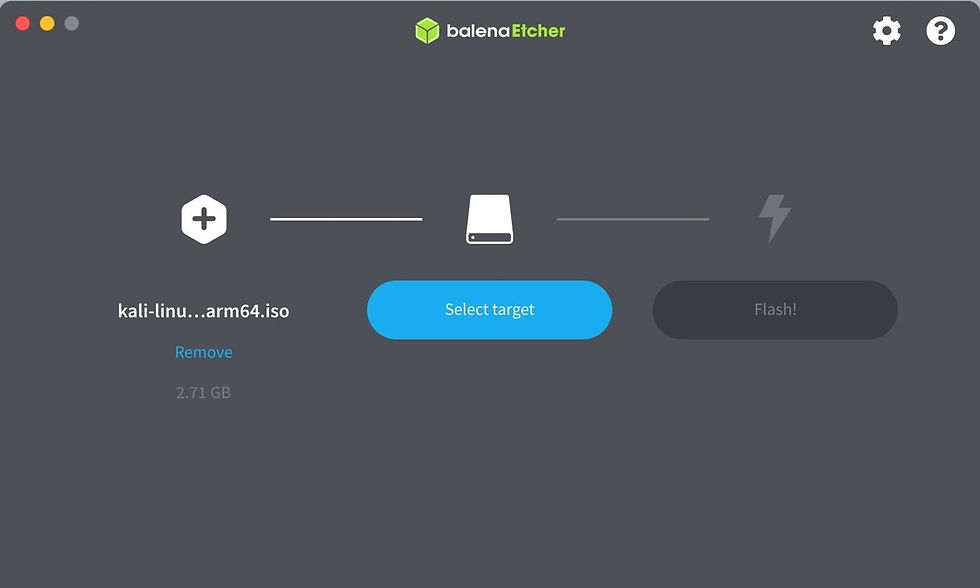
Now all that's left to do is click on "Flash!" This will reformat your flash drive so that everything will be erased and overwritten with the Kali Live image.

You may be asked to input your admin password to let Etcher do its magic, so go ahead and do that if it happens. Then, Etcher will show a progress bar indicating how much time is left for flashing the content over. You'll see a "Flash Complete" message when it's done.

Once the flashing is completed, boot your system from the USB. Once you've booted into the Kali Live USB flash drive, you should see a few different options for which version of Kali you want to load. To boot it up without saving any changes, just choose the "Live system" option, which will take you right into the new Xfce desktop environment as a non-root user.
Step 4: Set Up Persistence on Kali Live
Choosing one of the persistence options doesn't mean it'll work out of the box. There is some configuration to perform first, mainly creating a new partition to save all your data. Kali has some excellent instructions on doing so, which we are using.
To create a partition above the Kali Live partitions, ending at 7 GB, issue the following three commands in a terminal window as the kali user, which will keep the Live options in the 7 GB partition, freeing up the rest for your data storage. Make sure you're doing this from your Kali Live system you just booted into.
~$ end=7GiB
~$ read start _ < <(du -bcm kali-linux-2021.1-live-arm64.iso | tail -1); echo $start
~$ parted /dev/sdb mkpart primary ${start}MiB $end
When that's done, you should now have a third partition labeled something like /dev/sdb3 or /dev/disk1s3. Check your volume identifier because you'll need it for the rest of this process.
Next, run the following two commands as kali to create an ext3 file system labeled "persistence."
~$ mkfs.ext3 -L persistence /dev/sdb3
~$ e2label /dev/sdb3 persistence
Next, create a mount point, mount the new partition there, create a configuration file to enable persistence, then unmount the partition.
~$ mkdir -p /mnt/my_usb
~$ mount /dev/sdb3 /mnt/my_usb
~$ echo "/ union" > /mnt/my_usb/persistence.conf
~$ umount /dev/sdb3
Now, reboot into Kali Live and choose the appropriate system, and everything should be all set.


Comments